

Most kitchens are finished to a high standard and lit to a poor one. Thirteen decisions our designers make on a kitchen lighting plan, from the strip behind the splashback to the glow beneath the island, with the mounting heights, colour temperatures and beam angles behind each.
A kitchen asks more of its lighting than any other room in a house. People chop and read labels at the worktop, which calls for bright and accurate light falling exactly where their hands are. They sit at the island with guests an hour later, which calls for something far softer and considerably lower. Then they walk through at midnight wanting enough light to find a glass and no more. A single fixture in the middle of the ceiling serves none of those three well, which is why so many expensively finished kitchens still feel flat.
Almost every kitchen we draw ends up with four or five separate circuits, and the cost of the extra cabling is trivial against what it does for the room. What follows are thirteen decisions our designers make on a kitchen lighting plan, with the mounting heights, colour temperatures and beam angles behind each. Settle them while the walls are open, because a circuit discovered after the splashback is fixed is an expensive correction.
Light the Splashback, Not the Worktop
The most useful fitting in a kitchen is the one nobody sees. A continuous strip recessed into the underside of the wall units washes light down the full height of the splashback and onto the counter, which puts the brightness on the surface people work at and removes the shadow a body casts under a ceiling downlight.
Set the strip 30 to 50 mm back from the front edge of the cabinet inside a shallow rebate so no diode is visible from a seated position at the island. Run it at 3000 K with a colour rendering index above 90, which is the point at which a green marble reads green and a tomato reads red. Continuity matters as much as output, so order the run as a single length where the cabinetry allows, since a visible join between two strips undoes the effect across an entire elevation. Allow 8 to 10 watts per metre in a pale kitchen, which is enough to prepare food by without the counter reading brighter than the room around it.
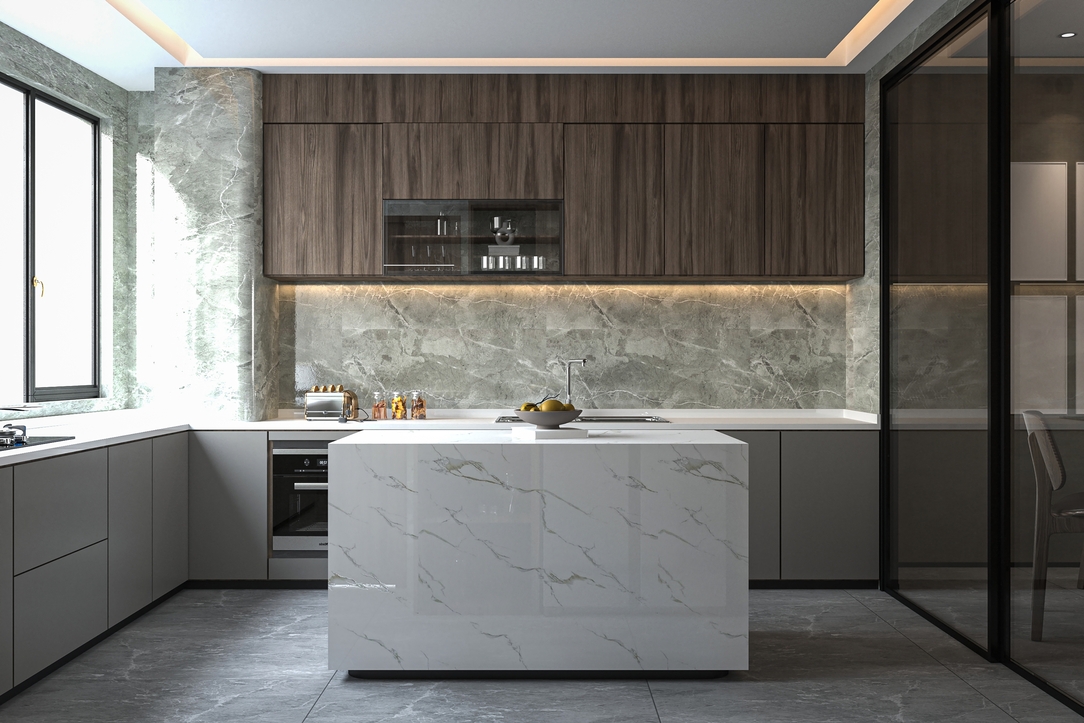
A walnut and grey kitchen with a green marble splashback lit by a continuous under-cabinet strip, and a white waterfall island.
Letting Daylight Do the Work
Not every kitchen needs a visible fixture over the island. A room with a full wall of glazing and a pale stone surface will carry most of the day on daylight alone, and the restraint reads as confidence.
The decision has consequences for the stone. A polished surface opposite a window throws glare across the worktop by mid-afternoon, so we specify honed or leathered finishes where daylight arrives from the side. Blinds in a slim timber or fabric keep the light diffuse, and the artificial layer stays entirely concealed for the evening. Rooms like this still need a full scheme behind the scenes, since a kitchen that works beautifully at noon can be unusable at seven in the evening.
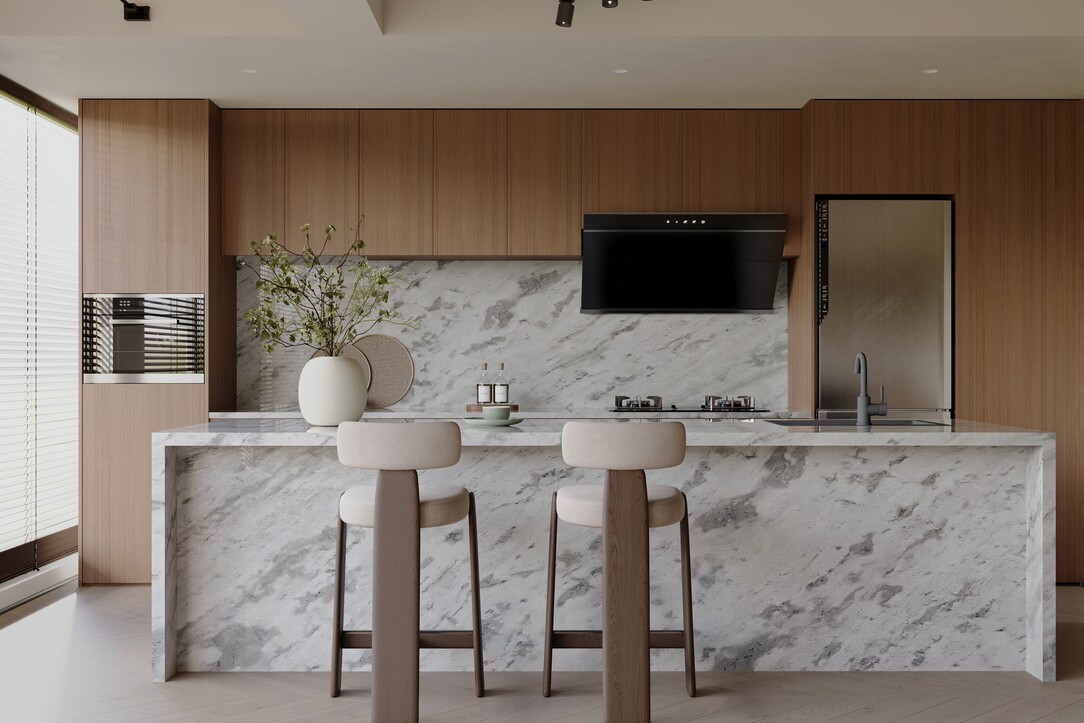
An oak kitchen with a marble island and splashback, two upholstered stools and daylight entering through slatted blinds.
Scaling Pendants to the Island Beneath Them
Pendants over an island are the one decorative decision in a kitchen that people see from the next room, and undersized fittings are the most common error. A pair of generous pleated shades suits an island of two to three metres; anything smaller disappears against tall cabinetry.
Hang them 750 to 800 mm above the worktop so the light falls on hands and clears the eye line between two people seated opposite. Space a pair at roughly a third and two thirds along the island length, and centre them on the island itself where it sits off the geometric middle of the room. Opal or fabric shades spread light more kindly over a worktop than a clear glass globe, which casts a hard pool and a visible filament.
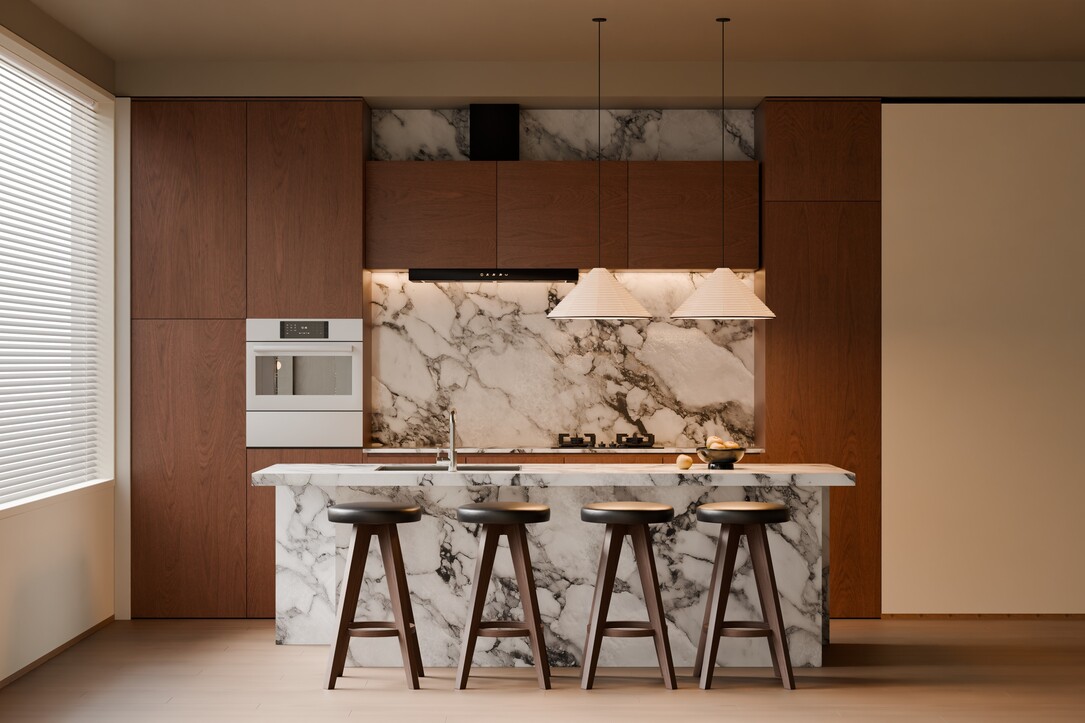
A walnut kitchen with a dramatic marble splashback, two pleated pendants above the island and a run of under-cabinet light.
The Lit Plinth, and Why It Changes a Room at Night
A recessed strip in the plinth of an island lifts several hundred kilos of stone off the floor and holds it there. The detail costs very little and does more for a kitchen after dark than any other single move.
Set the strip 80 mm back inside a shadow gap so the diodes stay hidden from every standing and seated position, and run it on its own circuit so it can be left on alone late in the evening. Decorative globe fittings above the dining table complete the layer, and the two together let the room function at a very low level with every downlight switched off.
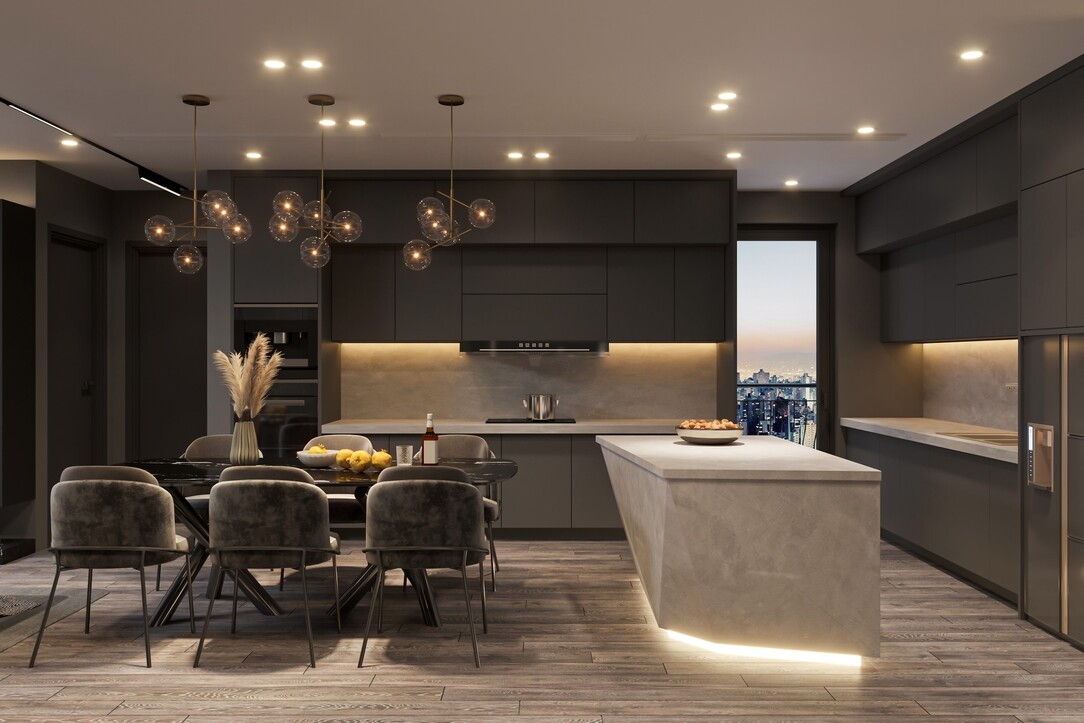
A dark grey kitchen at dusk with brass globe chandeliers over the dining table and a lit plinth beneath the stone island.
Dark Kitchens Depend Entirely on the Light Line
A kitchen finished in dark stone and charcoal cabinetry swallows light, and the scheme succeeds or fails on one detail: the strip between the wall units and the worktop. Lit properly, the dark stone gains depth and the veining comes forward. Lit poorly, the whole elevation closes up.
We raise the output in dark rooms, typically to 12 to 14 watts per metre against 8 to 10 in a pale kitchen, and keep the temperature warm at 2700 to 3000 K so the warmth counteracts the cool of the stone. A deeper rebate also helps, since a dark cabinet face shows a bright diode more readily than a pale one.
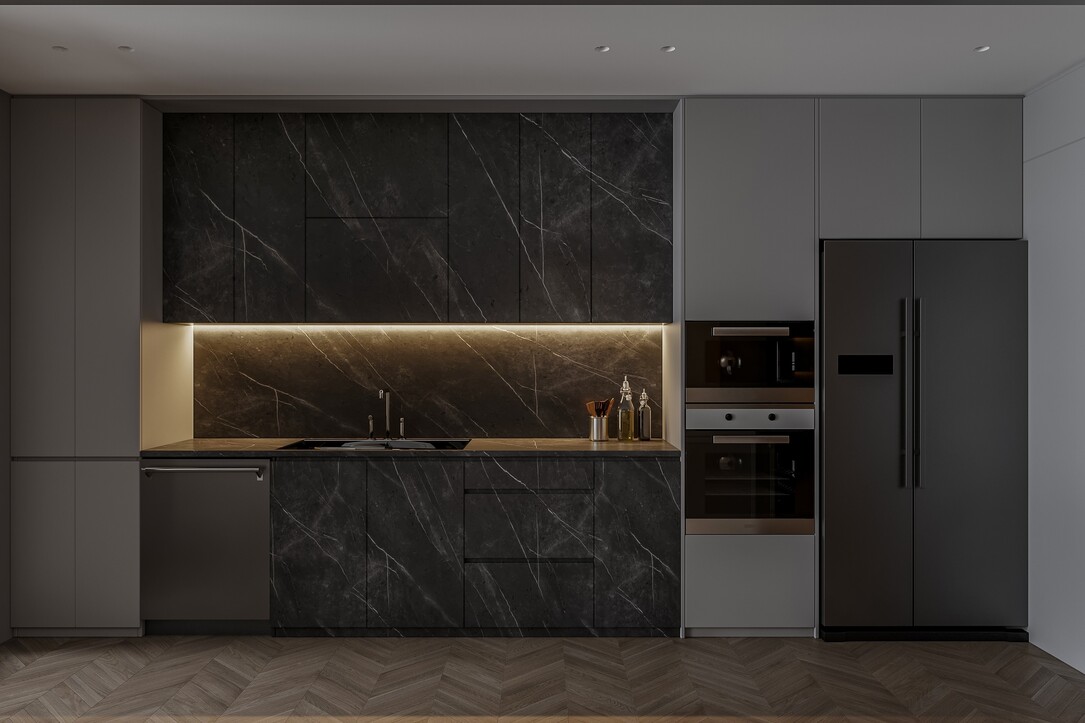
A charcoal kitchen with dark marble cabinet fronts and splashback, lit by a single bright strip beneath the wall units.
Grazing Stone to Bring Out the Veining
Light striking a surface at a shallow angle reveals texture that flat light flattens. Setting the strip close to the wall and aiming it down the face of the splashback turns a slab of grey marble into the most interesting surface in the room.
A grazing angle of roughly 10 to 15 degrees from the wall face gives the strongest reading. Book-matched or heavily veined stone rewards the treatment most, and the effect is worth testing with a sample slab and a temporary strip before the stone is cut. Slab layout decides half of this, which our guide to marble kitchen designs covers in detail.
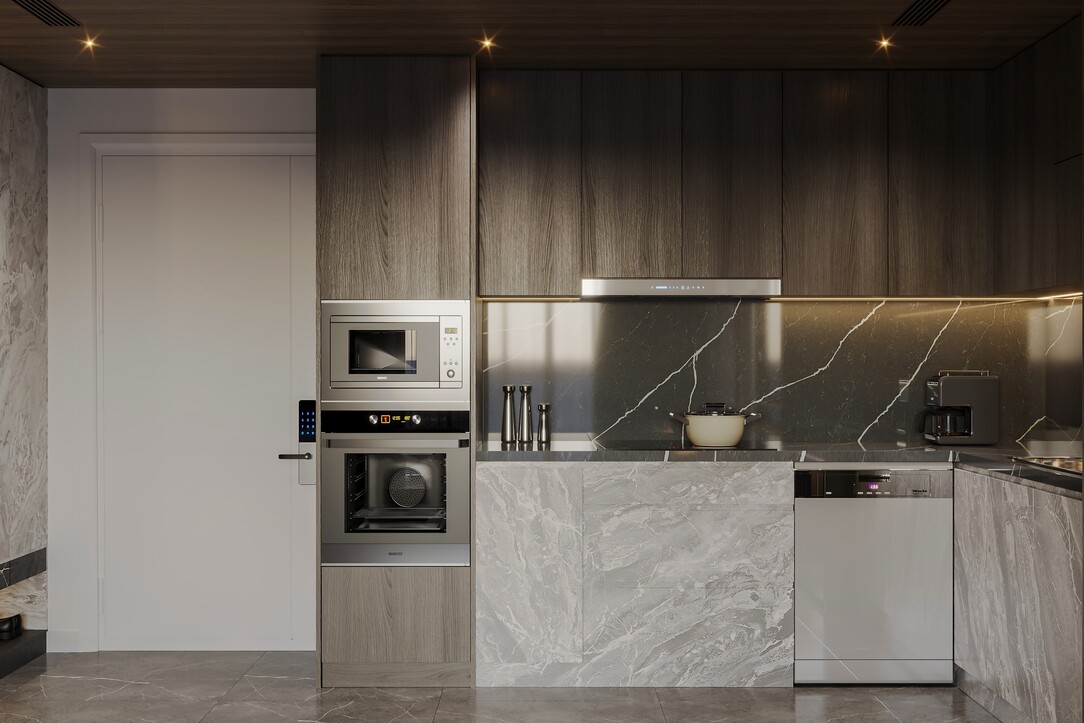
A dark timber kitchen with a veined marble splashback grazed by concealed lighting and an integrated extractor hood.
Ceilings That Carry the Ambient Layer
Downlights scattered across a kitchen ceiling rarely help. Clustering them where they are needed, and giving the rest of the ceiling a surface worth looking at, produces a calmer room with better light on the counters.
A timber-lined ceiling with recessed spots grouped over the working runs keeps the plasterboard free of holes and warms the reflected light. Hold the downlights 800 mm off the wall so they wash the cabinetry and leave the skirting alone, and specify a 36-degree beam with a deep baffle to control glare. Our guide to ceiling design ideas sets out the cove and tray options that suit a kitchen.
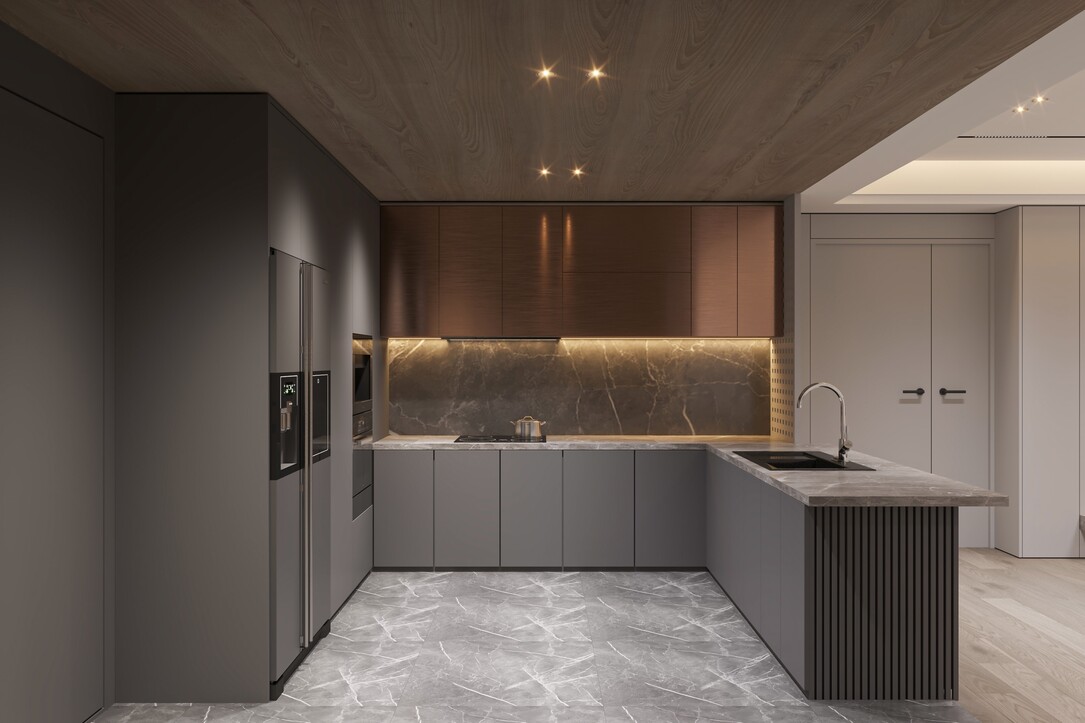
A grey kitchen with a timber-lined ceiling, recessed spots over the working run and a fluted peninsula.
Reflective Upper Cabinets as a Second Light Source
A polished or metallic cabinet face above the counter picks up the strip beneath it and throws a soft second wash back into the room. Burnished copper, bronze and antiqued mirror all behave this way, which makes them unusually useful in a kitchen with little daylight.
Keep the finish matt everywhere else so the reflective panel stays the brightest element, and restrict it to the upper run where fingerprints are less of an issue. A sealed lacquer over the metal protects it from cooking heat and makes it wipeable. The same principle works with antiqued mirror in a narrow kitchen, where the reflected strip doubles the apparent depth of the room.
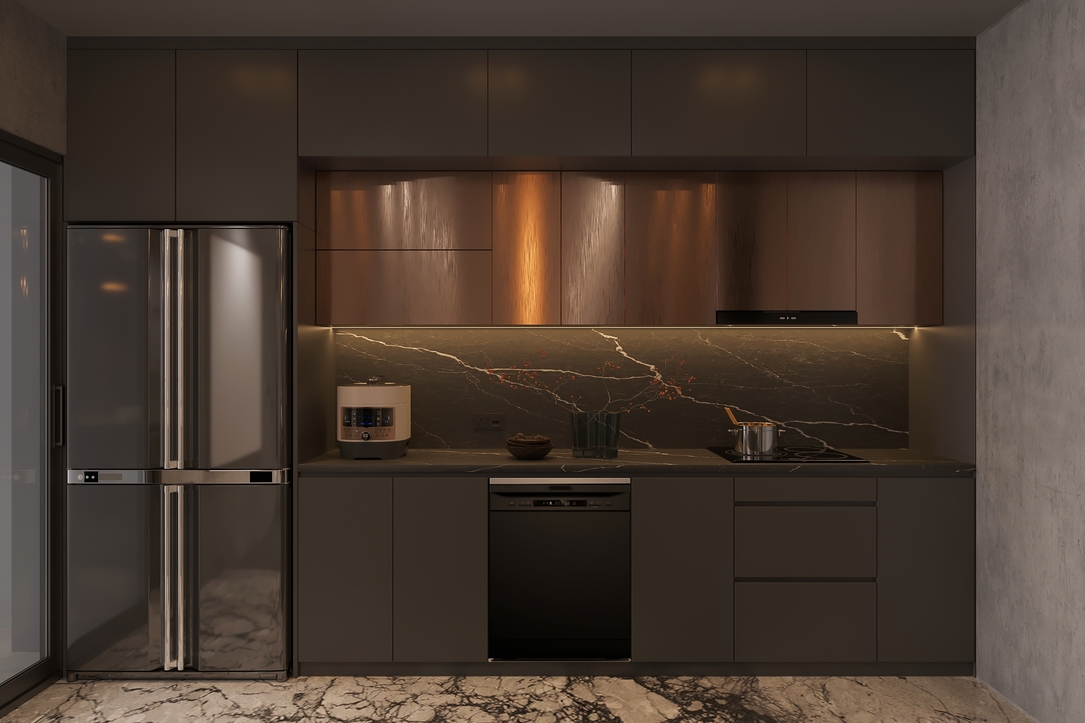
A dark kitchen with burnished copper upper cabinets reflecting the light from a strip above a veined black splashback.
Lighting an Open Plan in Separate Layers
When a kitchen runs into dining and living, one lighting scheme across the whole volume makes every zone feel like a corridor. Each area needs its own fitting character and its own circuit.
Recessed spots over the kitchen run, a pendant cluster centred on the dining table, and track lighting washing the living wall give three distinct settings from one ceiling. Run the flooring continuously underneath so the room still reads as one space, and put every circuit on a dimmer. The principles behind layering like this appear in our piece on multidimensional lighting strategies.
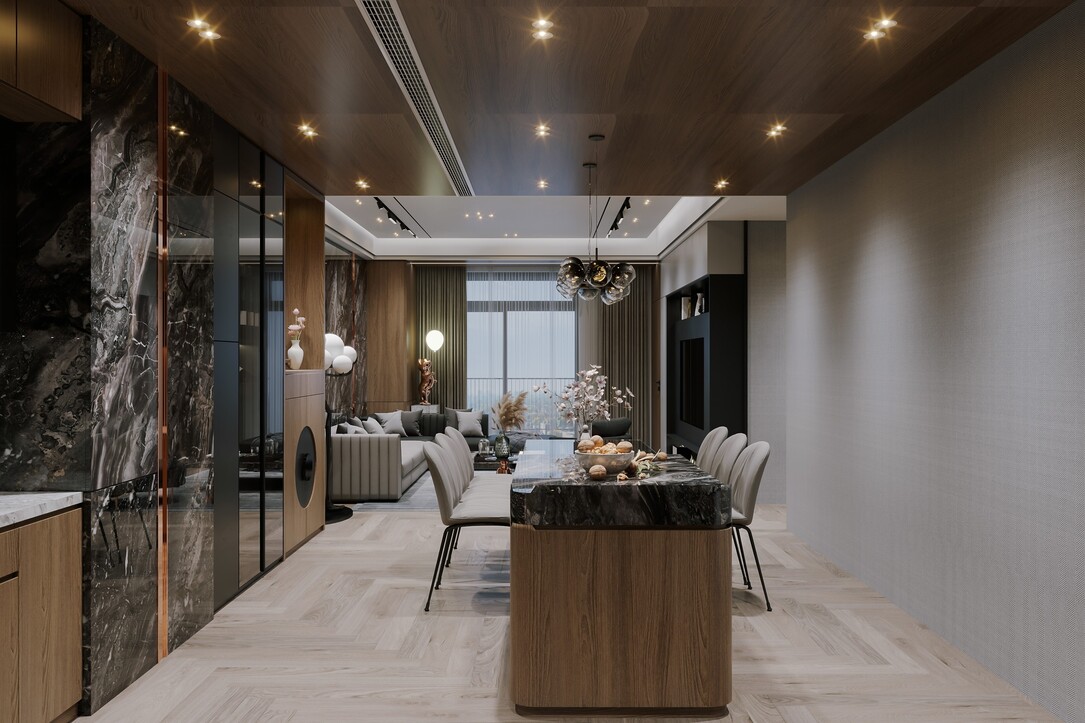
A long open-plan kitchen, dining and living space with a timber ceiling, track lighting and a pendant cluster over the table.
Small Kitchens and the Vertical Light
Narrow galley kitchens gain more from a vertical line of light than from another ceiling fitting. A slim strip run up a tall cabinet return, or down the edge of a window reveal, lifts the eye and makes a tight plan feel taller.
Pair it with slim pendant drops over the counter in place of a central fixture, which keeps the ceiling plane quiet. In apartments with a night view, keeping the general lighting low enough preserves the window as part of the room and keeps the glass from turning into a black mirror. Dimming the ceiling circuit to around thirty per cent after dark is usually enough to hold the view.
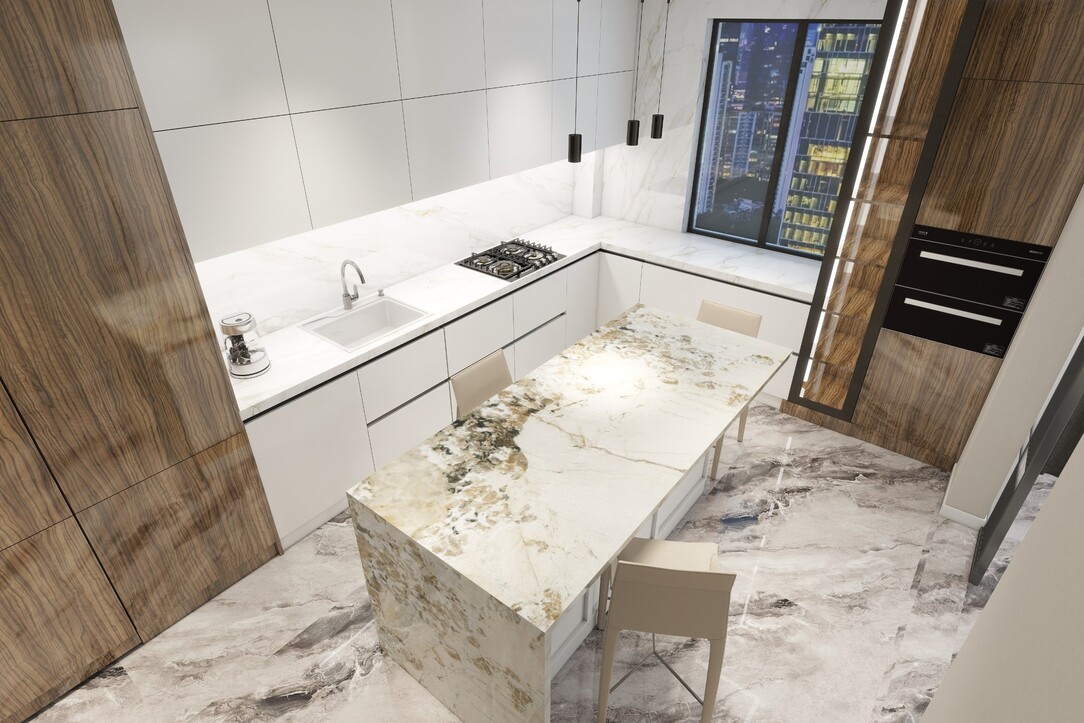
A compact white kitchen seen from above, with slim pendant drops, a lit vertical strip and a city view through the window.
Lit Glass Cabinets as the Display Layer
A glazed cabinet lit at every shelf turns storage into the decorative element of a kitchen, and it gives the room somewhere to look when the worktops are clear. Bronze-tinted glass keeps the contents calm.
Specify 10 mm glass shelves with polished edges so light travels down through the full height of the unit, light each shelf from the front edge, and wire the cabinets on a separate scene so they can glow alone once the kitchen is closed for the night. More of this detailing sits in our guide to built-in joinery ideas.
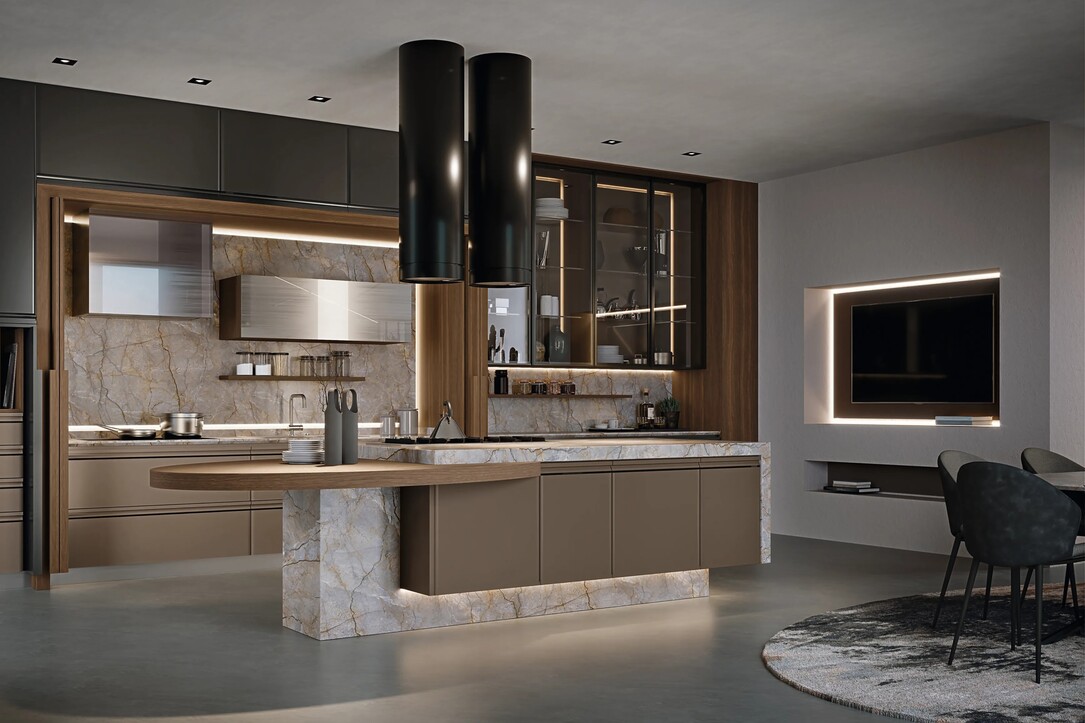
A showroom-style kitchen with twin black cylindrical extractors, lit glazed cabinets and a backlit niche on the far wall.
One Decorative Fitting, Chosen as an Object
Every kitchen benefits from a single fitting that exists for its appearance ahead of its output. A linear brass fixture with opal globes, hung across the island, gives an otherwise architectural room a piece of jewellery.
Keep it the only decorative element in the room and let the rest of the scheme stay concealed. Dim it to around forty per cent for evenings, and check the lamp is visible from a seated position without glaring, since a bare globe at eye level across an island ruins a dinner.
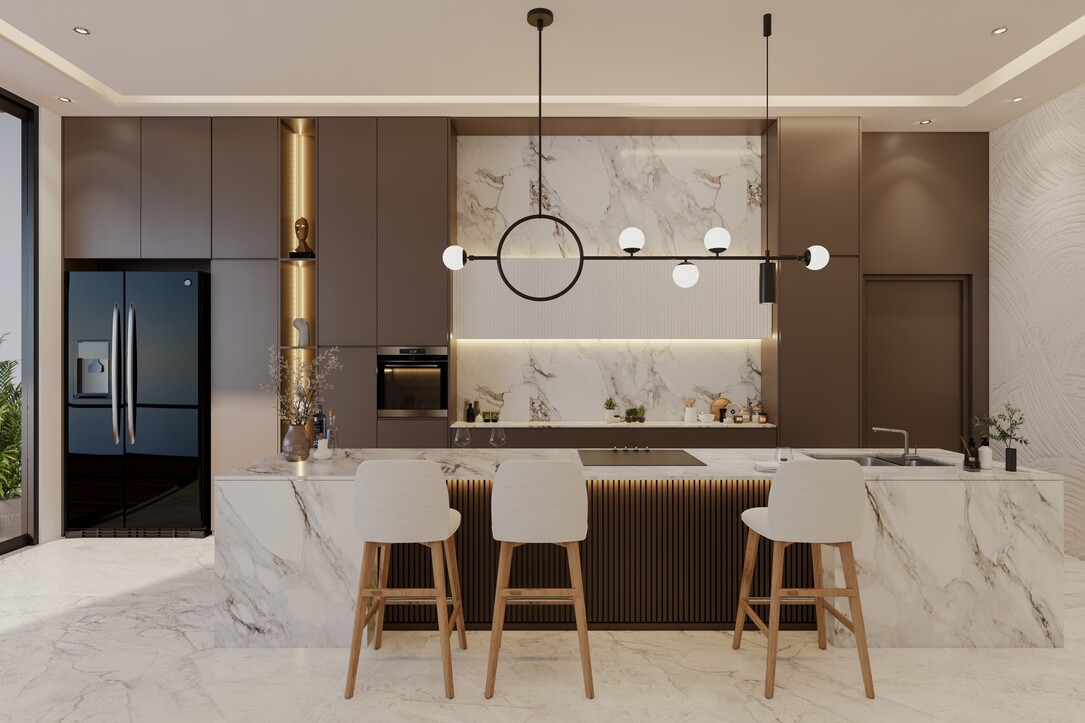
A brown and marble kitchen with a linear brass and opal globe pendant above the island and a lit stone niche behind.
Bringing the Layers Together Over the Island
The best kitchens combine three of these at once over the same piece of stone: a concealed strip lighting the splashback behind, a linear pendant above the island, and a lit plinth beneath it. Each one is doing a different job at a different height.
Commission them on three circuits with three dimmers, and set the scenes before handover: bright for cooking, mid for eating, and plinth only for late in the evening. Programming takes an hour at the end of a project and is the step most often skipped, which leaves a client with an expensive scheme they only ever use at full output.
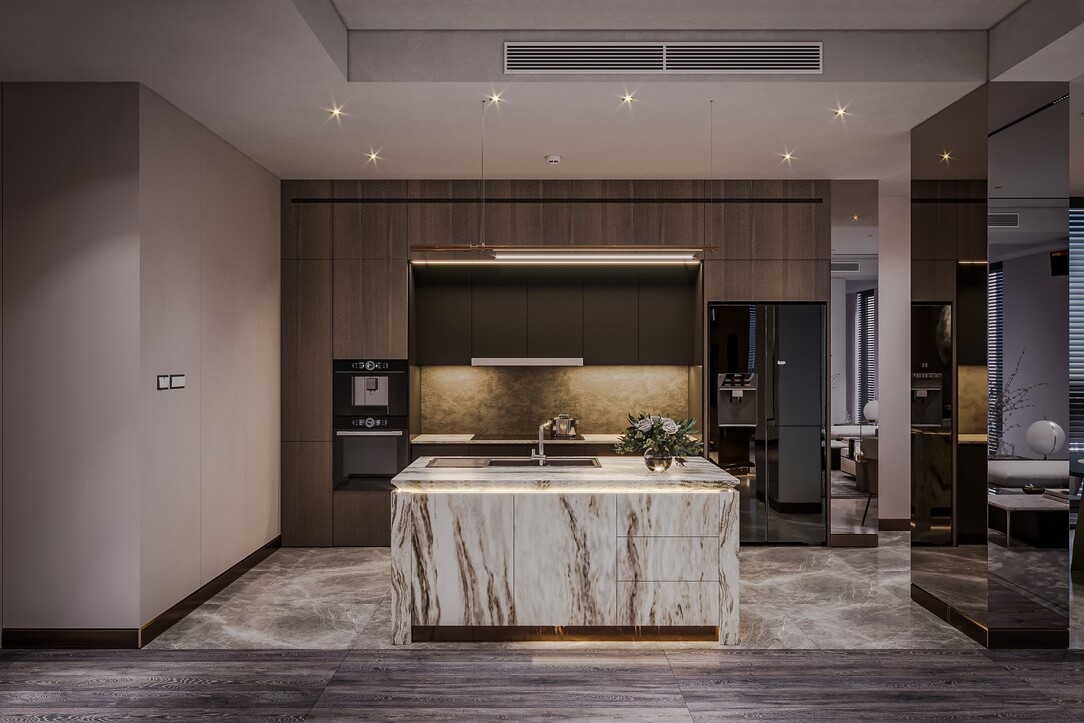
A kitchen with a backlit marble island, a linear pendant above and concealed lighting behind the stone splashback.
Plan the Circuits Before the Cabinetry
Decide the splashback strip, the island pendant, the plinth detail and the ceiling layer together, on separate circuits, while the walls are still open. Our team handles concept, technical drawings and execution with one in-house group of designers, architects and engineers, and our kitchen interior design service covers the lighting plan alongside the joinery and stone. Fill out the contact form and one of our designers will come back with a layout, a lighting scheme and an honest budget range.
Kitchen Lighting Ideas: Frequently Asked Questions
What colour temperature works best in a kitchen?
2700 to 3000 K throughout, with a colour rendering index above 90 so food and finishes read accurately. Anything cooler makes timber and warm stone look grey.
How high should pendants hang above an island?
750 to 800 mm above the worktop. That clears the sightline between people seated opposite each other and puts the light on hands.
Where should an under-cabinet strip sit?
Recessed into the underside of the wall units, 30 to 50 mm back from the front edge, so the diodes stay hidden from a seated position at the island.
How many circuits does a kitchen need?
Four or five: the under-cabinet strip, the ceiling downlights, the island pendant, the plinth or feature lighting, and any dining fitting. Each on its own dimmer.
Is plinth lighting worth it?
Yes, for very little money. It makes a heavy island appear to float, and it gives the room a usable light level late at night with everything else switched off.
Why does my dark kitchen feel gloomy despite plenty of fittings?
Dark surfaces absorb light, so output needs raising at the counter and the strip needs to be continuous. Scattered ceiling downlights alone leave the working surfaces in shadow.
Should lighting be decided before or after the cabinetry?
Before. Circuits, strip rebates and pendant positions all depend on the cabinet layout, and adding them afterwards means opening finished walls and ceilings.